Restoring Cracked Leather Bridle Reins Without Weakening Stitching
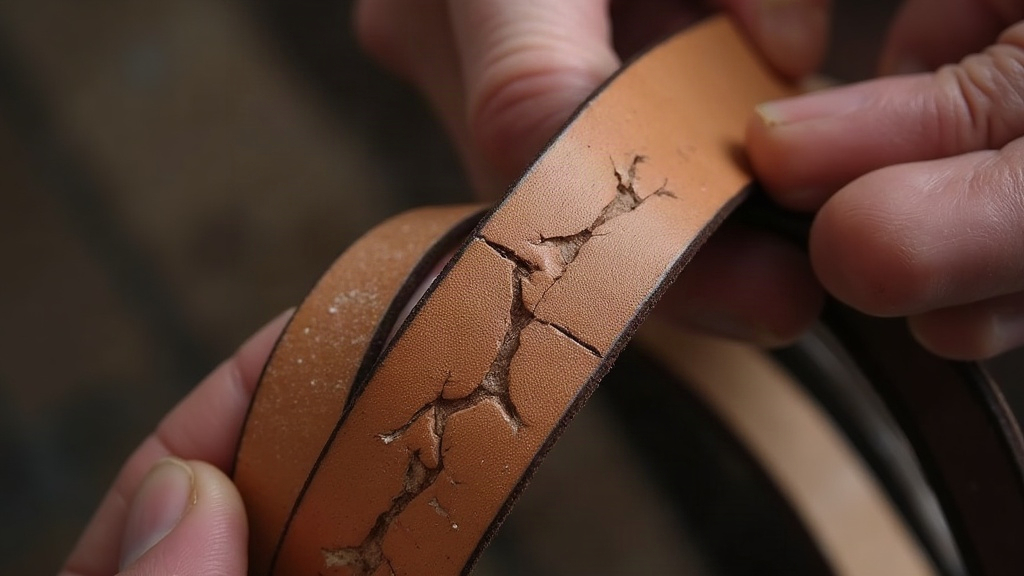
Cracked leather reins aren’t just an eyesore. They’re a safety problem sitting there, waiting for the wrong moment to show up. Fixing them the right way means putting moisture back into the leather fibers without drenching the thread that holds everything together. Over-saturate the stitching and you’ve turned a cosmetic flaw into a rein that snaps mid-ride. Below is a process that’s actually safe: one that brings back flexibility without wrecking the stitching in the process.
Why Reins Crack in the First Place
Leather dries out when it loses its natural oils and fats, and that usually comes down to a mix of these culprits:
- Sun and heat exposure. UV rays break down collagen fibers faster than just about anything else you’ll expose the leather to.
- Repeated wet-dry cycles. Sweat, rain, washing: each one strips oils, and if you don’t recondition afterward, the damage compounds.
- Neglected storage. Reins folded tight or coiled up in a tack room for months develop stress cracks right at the fold points.
- Over-cleaning with harsh soaps. Some saddle soaps are alkaline. Used too often without conditioning afterward, they degrease the leather more than they clean it.
Cracks tend to start at the bit ends, around buckle holes, and anywhere the rein bends over and over. That’s almost always right near the stitched seams, which is exactly why how you restore them matters as much as whether you do it at all.
Step 1: Inspect Before You Treat
Don’t reach for the conditioner yet. Flex the leather slightly and take a real look first:
- Are the cracks surface-level (just the finish or top grain), or do they run down into the stitching holes?
- Check the thread separately from the leather. Is it fraying? Loose? Or still holding tight?
- If the stitching’s already compromised, get it repaired by a tack professional before you condition anything. Oil softens waxed thread, and on already-weak stitching that’s enough to speed up unraveling.
Step 2: Clean Gently, Avoid Soaking
Grab a barely damp cloth and a mild glycerin saddle soap. Work in small sections. Never dunk the reins in water. Stitching holes behave like wicks, they pull moisture deep into the thread core, and that moisture doesn’t dry evenly once it’s in there. Wipe off the dirt and sweat salt, then let the reins air dry completely, away from any direct heat, before you move on to conditioning.
Step 3: Condition in Thin, Repeated Layers
This is where most people mess it up. One heavy coat of oil, and the stitching soaks right along with the leather. A better approach:
- Pick a conditioner made for tack, not a heavy neatsfoot oil. Neatsfoot can over-soften thread and weaken it over time.
- Apply a thin layer with a soft cloth, working it into the leather itself, not flooding the stitched seams directly.
- Give it several hours to absorb, then wipe off any excess before it has a chance to pool near the stitch lines.
- Do this in 2-3 light applications spread over several days, instead of one big soaking session.
Beeswax- or lanolin-based products tend to bring back suppleness without over-softening the thread, since they sit closer to the surface rather than pushing deep into the fibers the way raw oils do.
Step 4: Flex, Don’t Force
Once the conditioner’s gone on, flex the reins gently by hand along their length. This works the product in and gives you a sense of how flexible they actually are now. Don’t bend sharply right at the old crack lines, that can deepen the fissure instead of closing it up. If a crack won’t close or still feels brittle under your fingers, that’s cosmetic damage you can keep an eye on, not necessarily a structural failure, but it needs watching.
Step 5: Protect Stitching Separately
The thread needs its own kind of attention:
- Rub a small dab of beeswax along the visible stitch lines. It seals and waterproofs without softening the fibers.
- Don’t let conditioner pool on knots or stitch holes. Wipe it away as soon as you notice it.
- Check the stitching every few weeks after restoring the reins. Reconditioned leather flexes more than before, and that extra movement can expose weak threads that used to be stiff enough to hide the problem.
When to Stop Restoring and Replace
There’s a limit to what restoration can fix. Replace the reins instead if:
- The cracks go full-depth and leather flakes off when you flex it.
- Stitching holes have stretched out or torn, not just loosened thread.
- The leather has worn thin unevenly, leaving a weak spot regardless of how the surface looks.
Reins are the one thing physically connecting you to the horse. If you’re not sure, get a qualified saddler to look at them before you trust them again at any real speed.
Maintenance Schedule to Prevent Future Cracking
- Clean after every ride where sweat’s involved, and do a full conditioning every 4-6 weeks.
- Store reins uncoiled, or hung loosely, away from direct sun and heating vents.
- If you ride a lot, rotate between two sets of reins. Give the leather time to rest and pull back in some natural oils between uses.
Conclusion
Fixing cracked leather bridle reins at home is doable, no question, but it takes a lighter hand than most riders think going in. The point isn’t to drown the leather in oil. It’s to bring moisture back into the hide gradually, while keeping the stitching dry, tight, and treated on its own terms. Stick to thin layers, check the thread regularly, and learn to tell when a crack has stopped being cosmetic and started being a real risk. Get it right, and you can add years of safe, supple life to a pair of reins, instead of papering over a problem that’s quietly getting worse underneath.