Hand-Carving Oak Leaf Tooling Patterns on Journal Covers
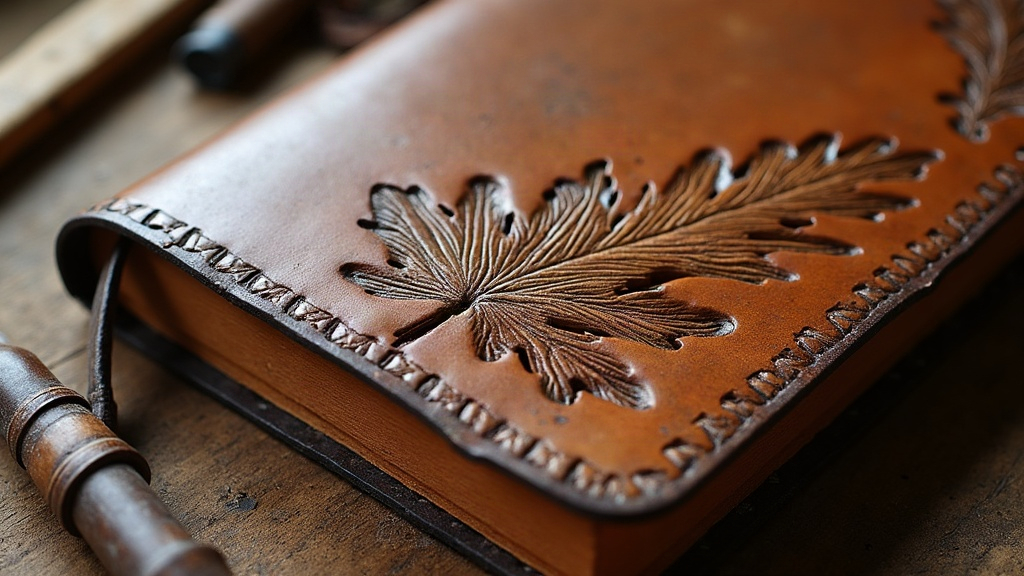
Hand-Carving Oak Leaf Patterns on Small Leather Journal Covers
Hand-carving oak leaf tooling patterns on small leather journal covers is one of those projects that turns a plain blank into something you’ll actually want to keep. Oak leaves give you organic, flowing lines that forgive a shaky hand while still looking like you know what you’re doing. This guide covers the materials, the carving sequence, and the finishing steps you need to land crisp, professional results on a journal-sized piece.
Why Oak Leaves Work Well on Small Covers
Big floral scrolls lose their shape when you shrink them down, but oak leaves aren’t like that. Their lobed silhouette still reads clearly at 2-3 inches, which is roughly the size you’re working with on most journal covers. There’s another bonus: the natural asymmetry of a real oak leaf hides small carving slip-ups far better than a rigid geometric pattern would. If you’re moving past basic borders and want to try something figurative for the first time, this is a smart place to start.
A few reasons this motif suits journal covers specifically:
- Compact footprint - a single leaf cluster or a short trailing vine fits comfortably on a 5x7 or 6x8 inch cover without feeling cramped.
- Visual balance - a leaf can frame a monogram, curl around the spine, or anchor a corner on its own.
- Forgiving texture - the veining and shading do a lot of work covering up minor knife wobbles, so your mistakes stay your secret.
Materials and Tools You Need
Before you sit down to carve, get these together:
- Vegetable-tanned leather, 7-9 oz for covers (thick enough to hold a clean, lasting cut)
- A sharp swivel knife with a fine or regular blade
- A veiner, a beveler, and a small leaf/petal lobe stamp set
- A background tool, if you want that raised, 3D leaf look
- A modeling sponge and water for casing the leather
- A tracing stylus plus acetate or tracing paper
- A granite or marble slab and a rawhide or poly mallet
Step-by-Step Carving Process
1. Case the Leather Properly
Dampen the leather with your sponge, then let it sit until the color comes back to its natural shade. That’s the “case” state, and it’s when the fibers cut the cleanest. Get this wrong in either direction and you’ll pay for it: too wet and the leather tears, too dry and the blade just skates or drags.
2. Transfer the Oak Leaf Pattern
Sketch or print an oak leaf design scaled to your cover. A single leaf with a short stem works nicely, or try two overlapping leaves with an acorn if your cover is around 6 inches. Trace the design onto the cased leather with a stylus, pressing firmly enough to leave a visible groove, but not so hard you cut through.
3. Cut the Main Outlines
Hold the swivel knife vertical and cut along your traced lines using smooth, continuous strokes. Oak leaf edges aren’t straight, so slow down around the lobes. Tight curves demand shorter strokes and a lot more wrist rotation than you’d use on a plain border line.
4. Bevel Around the Leaf
Take your beveler and push the background down just outside each cut line. This is what tricks the eye into thinking the leaf is sitting above the surface. Angle the tool so the heaviest pressure lands right next to the cut, then ease off as you move further away.
5. Add Veining Detail
Stamp the veiner lightly down the center rib and the side ribs of each lobe to suggest real leaf veins. Keep the strokes gently curved, not ruler-straight. Real oak leaf veins sweep upward from the stem in a soft arc, and copying that detail is what sells the illusion.
6. Texture the Background (Optional)
Want the leaf to really stand out? Use a matting or backgrounding tool to stipple the area around it. This trick works especially well on journal covers, where the leaf often sits by itself without a busy border competing for attention.
Common Mistakes to Avoid
- Cutting too deep - this thins out the leather and can lead to cracking right where the cover bends open and shut, day after day.
- Rushing the bevel - an uneven bevel flattens the whole 3D effect, and that’s the detail that separates amateur tooling from polished work.
- Skipping a practice piece - always run your pattern and pressure settings on a scrap of the same leather weight before you touch the real cover.
Finishing the Journal Cover
Once the carving’s done, let the leather dry completely. Then apply an antique gel or leather dye so it settles into the recessed cuts and brings out the veining. Buff off whatever’s left over with a soft cloth, then seal everything with a light coat of resolene or acrylic finish. This step matters more than you’d think, since journal covers get handled constantly, and that means daily exposure to hand oils and the occasional spilled coffee.
Final Thoughts
Oak leaf patterns bring a timeless, nature-inspired look to hand-carved journal covers, and their forgiving, organic lines make them a natural next step once you’ve got basic borders and geometric stamps under your belt. Case your leather properly, take your time with the knife, and bevel with patience, and even a small cover can carry a design that looks like it belongs in a gallery. Start with one leaf. Get comfortable with the veining and shading. Before long you’ll be ready to carve full vine clusters across bigger leather projects.